As part of my week of rest and relaxation in Greece, I booked an excursion through Thompson to go scuba diving. For €61 that got me a single dive including all gear rental and boat fees with Waterhoppers dive team.
I was collected from my hotel and taken to the dive boat based in Rhodestown. The boat is practically a small cruise ship! It is fully self contained with everything you need onboard. We set sail from the harbour and we would be diving just outside of Kalithea Springs.
The journey from Rhodes Town to Kalithea Springs is about 45 minutes.
The dive centre has a floating platform installed which they moor up to. We did both dives at this site, but did we went in different directions for each dive.
We were to be using 12 litre steel tanks which surprised me, in such a warm country I would have expected aluminium. I personally wore a 2mm shorty wetsuit. Now normally my core temperature is never an issue when I dive, if my extremities get cold to make me uncomfortable then I might call the dive, but I've never called the dive due to getting cold before someone else already has long ago. As a result when I said that I was starting to get a slight chill by the end of the 60 minute dives, if you are a person that DOES feel the cold easily, then I'd recommend using a full wetsuit, and probably 3mm at a minimum.
Out of the entire boat, only 5 of us were qualified divers so we were split between two instructor / guides. I was with Marie and the others were with David. Both are a good pair.
The dives were fantastic, average depth would have been about 6m. Both dives were nearly an hour but they felt like less than half that. At Kalithea Springs there are several swim-throughs and short caves which make for interesting sights. My favourites would be mushroom rock, which is a giant rock that is mounted on several other rocks to give you room to swim underneath.
Also the other is called the blow hole, it is a tunnel that runs up at about a 25° angle to eventually surface in a cavern from a depth of about 12m.
It didn't feel like 5 minutes ago that I was reviewing the line up of products on offer from Dive Signs, and I explicitly remember thinking to myself as I was writing it that Mark is always innovating (in particular I was thinking about the NFC tags he dabbled with). Well, he's gone and done it again.
In June 2016, Mark put out feelers about his latest idea ....
New Product: Alien stickers
The Alien stickers are the result of a problem faced by underwater videographers and photographers : when using video lights or strobes, the stickers are just too good and can either cause distraction (best case) in the frame, or can destroy the image due to the high reflectivity.
Look at the reflector on my drysuit arm!!
So on Saturday June 2nd 2016, Mark and I went for a dive out of Swanage on the Kyarra (actually as part of my joint birthday and stag-party - if you are interested in reading about all of our shenanigans then have a read here). Conditions were pretty horrific if I'm being honest. On the surface we had 4-5m swells, winds were around 30 mph - it was pretty hellish!
When we did eventually get in the water, we were met by a dark-green world with very strong currents.
Deck bollards on the Kyarra
You can see in the picture above, its dingy green and we are only at about 24m. So Mark and I did our dive. I was using my GoPro trying to shoot some video of the dive. The images in this review are stills taken from the video of the GoPro Hero.
Alien stickers on Mark
Alien stickers on Mark
Alien stickers on Mark
Conclusion
Due to the grim greeny-ness of the conditions we couldn't see any glow-in-the-dark effect. Having said that, I could clearly read the stickers on Marks' twinset. It was only once Mark was getting too far ahead that I was losing sight of ALL of him that the stickers became unreadable (look at the first picture of the three in a row above, you can see a diver ahead of Mark - that's what I mean).
Better conditions are needed to truly evaluate how glowy the glow in the dark stickers are in the water, but in person they are like first photograph at the top of this blog! That image is not photo shopped or edited, they really are that bright (if not brighter!!)
If you are going to be diving with either videographers or photographers, its worth using these stickers, they are not ultra-reflective and so wont saturate the image, but they are still very clearly legible even under the grim conditions we had in Swanage.
It is likely that in a cave environment, you would be able to see your buddy purely off the sticker.
Another awesome product from Dive Signs, another recommendation from Dive Into The Fold!
So on October 31st 2015 at 1400 hours, I took the metaphorical plunge and proposed to my partner (read here). She said yes! As part of every engagement, there must be a stag do. Mine was due to start on Friday July 1st 2016. I chose this date because my birthday is July 1st, I thought it would help make an even more memorable event by combining it into one-mega trip.
So a plan is formed and before we know it the time is upon us! I've got an excited-nervous feeling. It's another major milestone on the journey to becoming married that is flying by!
First job, get the car filled up and not just with fuel! I've got to pack a set of golf clubs, trolley, twinset plus all of my associated rig, stage and regulators, two HID lights, drysuit bag, undersuit bag ...
A very full Loki
Day 1 - Friday 1st July 2016
Today is the day! Stag day 1 begins with me driving down to Essex... yes that's right friends, I will spend my 28th birthday DRIVING ... to my friend Mark who lives just outside Stansted. Leaving at 0951, my day is all about the driving ...
I'll be going the un-highlighted route in the map above - the A1 route is notoriously slow in practise, so whilst the route is theoretically longer it really isn't - I've lost many hours going on the A1 because of being stuck behind HGVs on a single track road. My recommendation is to always stick on the M6.
Google says 6 hrs 57 minutes, but in practise it takes longer because of coffee / fuel / food breaks and horrific traffic going past Preston and Manchester which ultimately ended up taking 10 hours. Seeing Mark and Faye's house was bliss and I could get out of my car at last!
The awesome Faye had made a lovely Fish pie with scallops which Mark and I ate on the "Romance Bistro Table".
Dinner on the patio!
Coming inside we had Mojitos and Faye then gave me my birthday treat: Carrot Cake!
Carrot cake!!!
We ended up staying up until 130am chatting and catching up!
Day 2 - Saturday 1st August 2016
0700 and the alarm is going off. Mark and I get some tea and toast down our necks and then get on the road to Swanage.
We stop at Fleet Services, I run in to the services to pay for a days parking, £15, and get more coffee. I'll be leaving my car here and jumping in with Mark to Swanage. Then on the way back to London, I'll jump out again, pick up my car and bring it to London to stay at Rob's house.
Jumping into Ellie, Mark and I head onward to Swanage. We don't get far and we end up coming off at the Winchester services to meet up with Rob and Chong where Rob gives me the first of many treats: some antlers!
Hitting the road again we continue on the way. The weather gets worse the closer we get. But coming into the harbour , the weather finally breaks and we have lovely sun shine.
We were diving the Aelion Sky, but the mark was changed to the Kyarra because it's closer. Normally I write a separate blog article about the dive, but this time I didn't think it was worth it.
Leaving the harbour ... and calm waters behind
We were diving off the Skua catamaran. A very wide dive-boat which was comfortable, until we hit the open sea - there were white caps everywhere. When Mark and I arrived in the harbour, he had been saying how if you can see the waves breaking like that its usually a sign to can it. The skipper said we would drive out, see what its like and decide there.
I'm wary of the upcoming dive!
Mark you handsome devil!
Chong ... always cool!
Rob, being Rob!
On the boat ride out, it was rough, 4m swells. The ride was only supposed to take 10 minutes, but took closer to 20. I started getting into my kit pretty much straight away. Arriving at the site, it was horrific. The swells were getting bigger. I was asking Mark, Rob and Chong how they felt - I was 50:50 about skipping this. Mark asked the skipper who said he was was happy. So in we jumped!
The descent took nearly 5 minutes! The shot line was at about a 40 degree angle running down tied off to what appeared anchor bollards. Mark was a little unsettled upon arriving at the wreck. I personally felt like I was heavily narked ... but I was at 24m! We stopped for a minute to catch our breath.
Anchor bollards (?)
We were on the bow and we headed off around the wreck. I don't know where we went, we poked about wherever we could. It wasn't long until Chong and Rob dropped down and met us too.
Rather than narrate the dive like normal (I couldn't!), I've put together a little gallery which are just still frames from the GoPro Hero camera that was running throughout the dive.
Underwater plant
The wreck is covered in life
There are some interior areas that could be explored
Mark from Dive Signs
Another cargo hold - too tight to get in safely
Mark and his EPIC light
Rob and Chong are in the distance and we are following
It looks like tiles.
Close up of Mark's newest 'alien' Glow In The Dark stickers
Spider Crab!!
Underneath a piece of the wreck
Mark
The hull of the Kyarra
Hull and team
Some kind of pipe
After around 35 minutes, I was down to around 120-110 bar in the set, I felt like I had seen enough. The skipper had also told us that our maximum run time was to be 50 minutes, so we would need the rest of the time to make our ascent.
I found a bit of wreck to hang on to with my knees and launched the DSMB. Letting go of the DSMB it went off at a 45 degree angle because of the currents! It was attached to a 45m spool so I felt reasonable happy it would make it to the surface ... and it did with plenty of line left.
Getting ready, we swam off the wreck and went drifting. Looking down the wreck was flying past below us, 20 mph maybe?
My over-zealous weighting was making my ascent harder and I was heading up but slowly, our way to the surface was a broadly minimum deco ascent (1 minute stop at 15m, 1 minute stop at 12m, 1 minute stop at 9m. The 6m stop didn't really exist it was more of a continual ascent, by 3m we were basically pulled up to the surface).
Upon hitting the surface, the conditions had settled down marginally. I surfaced facing Mark, looking around in front of me I couldn't see the boat, and it looked like Mark was looking about, my first thought was "oh god where is the boat". I was relieved when I saw it was coming up behind me! Mark got on first, I passed up my DSMB. I got on second. Panting. Crashing back down on the bench, feeling very seasick and generally awful. We just sat there continuing to breath off our 32% enriched oxygen mix in the twinsets while the skipper went around picking up other divers. Chong and Rob came up next. Followed by the rest of the divers (unknown to us).
The skipper blasted back to a bay to shelter us and give us 10-15 minutes of respite in calmer waters, and we had a brew of hot chocolate. Then we motored back into the bay. We got the kit off the boat and got changed.
After de-kitting from the boat we went over to the town, The Fish Plaice to get some chips to eat.
Bellies full we jumped back on the road to head to Rob's.
Just like on the way down to Swanage, we stopped at the Fleet services, I jumped out of Ellie, run over the bridge to the southbound services, drive down a junction and back up in Loki (my car!) where I then unloaded my dive gear from Mark's car back into mine. Unloaded, we hit the road once again to head to Rob's house in Camden.
The Night Out
Arriving at Rob's at 930pm, it is time for a rapid get-ready! We jump in the shower (not together, one after the other!) and get cleaned up. Rob now reveals some of his stag-night tricks! So the first thing is a sash that says "Groom To Be". Then there is a rosette which also says "Groom To Be", on the two tails, it says "Kiss Me" and "Buy Me A Drink". Next is a bag of badges with things like "Keep Calm - It's A Stag Party", Rob chose "Stag Wars"!
Well I'm ready!
So is Mark!
Its now almost 11pm. So we jump in Rob's lightning fast BMW X3 and tear arse through Camden to Shoreditch where he drops the car off at his Paragorn gym.
First things first - we need food! We go to a take away where Rob and I have a chicken swarma (an Israeli wrap) and Mark has chips! Chong arrives and the team is re-united.
First things first we get some cash and head to a gentleman's club: Rainbows Sports Bar (God knows how its calling itself a sports bar though!)
Next we went to Trafik which had a GREAT atmosphere I loved it there. Chong bought us a round of shots to kick things off. I also had my first Sol beer thingy!
We then got one of the best pictures of the entire trip.
Me with the guys! Chong, Rob, me and Mark (L-R)
Unfortunately Trafik shut at around 130, so we went back to Rainbows for one last treat for me!
It's now 3 am, I'm feeling pretty energised, asking the guys they were feeling full of energy too, despite us being up at 7am to go diving so we went to Aquarium.
Descending the stairs, the place is bouncin'! We grab some drinks and have a walk around - Rob tells me about this place and it has a swimming pool! Seriously?! So we head down to the basement and sure enough there is a large pool and hot tub. Wow!
We stayed in the club chatting with various people and drinking and a little bit of shuffling / dancing. By about 5am I was starting to feel pretty tired, checking with the others and we were all on the same boat ('scuse the pun) so we decided to call it, climbing the stairs out of the club we enter the streets of London into bright sunlight! Dang! Some people are starting to open up shops for the new day and we are bouncing around after a night out!!
We caught a taxi home and proceeded pass out in bed! An incredible night!
Day 3 - Sunday 2nd August 2016
Rob has booked us a game of golf with a tee time of 1339. After a very slow morning, we head over to a Greasy Spoon cafe for a fried breakfast. Chong joins us.
We head back to Rob's where we say goodbye to Mark and we bolt off to the golf course. We are playing at Bush Hill Golf Club. We arrive with about 5 minutes spare to tee-time. Fortunately there is a 2-person group in front of us so we ask them to go ahead of us which gives us a little breathing room.
Golfing-selfie!
We all have a very good round, but I'm clearly a magnet for balls as no less than 4 land within two feet of me during the day!
I went round with a good score for me. A couple of holes went really wrong, but generally a good score and an amazing day in the sun.
We say goodbye to Chong and head home. On the way we get pizza and getting home I get to meet Rob's girlfriend, Xana. I've known of her but this is the first time I've met her in nearly 9 years!!
We have a really nice, chilled evening and go to sleep around midnight. I have about 8 hours sleep.
Day 4 - Monday 3rd August 2016
Waking up at 9am, we have a lazy morning. we take Honey for a walk and go for another fried breakfast. The Londoners love baked beans as the plates are always half-full with beans!
After an epic weekend with my great friends, all good things must come to an end so I start the long drive home leaving at 11am. The weather got progressively worse as I got further north. I eventually arrived home just after 7pm, the journey took around 8 hours which is pretty good going.
Bloody awful weather ...
Arriving home, I did a very quick unload - diving gear has been left in the garden to be rained on to start rinsing the salt off. I've had an amazing time with my friends, even writing this now I think about the trip and I can't help but have an ear to ear grin. A total of 1,200 miles were travelled, and I now have memories that are going to last a lifetime and friendship bonds that have been made even stronger.
I've put together a short video to capture the celebrations.
During your fundamental SCUBA training, you will have been taught about the buddy system and always returning to the surface with a safe volume / pressure remaining. The reason for this is to cover issues that might arise during the dive.
All agencies will universally agree that having some level of reserves is mandated, however there is a differing level of definition and importancy put on it however.
This blog-post is to discuss the DIR philosophy on reserves, known as Minimum Gas, historically called Rock Bottom.
Why Do I Need A Reserve?
The purpose of the reserve is for ensuring that you still have breathing gas available for "unintended" situations. These "situations"could be minor things such as suffering a bad cramp on the way back to the shot line meaning:
You spend a few minutes stretching it out and
Swimming slower while the residual pain fades
Or, it could be a major situation such as getting lost inside a wreck (not that you went inside a wreck without proper training of course!).
This reserve is to cover a multitude of issues.
Typically BSAC state 50 bar as your minimum, although discussions using the rule of thirds is also explored. When I did my PADI training in 2007 I don't recall any true gas planning discussion although there was mention of coming back with a good volume left, of the order 500 psi (because I learned to dive in Florida). It wasn't until I started training with GUE on the Fundamentals course in 2010 that I encountered true gas planning as part of the curriculum.
The DIR view on reserves
Compared to the rather vague guidance from PADI and BSAC, the DIR diving system defines this reserve quite explicitly and it is thus :
Minimum Gas, or rock bottom, is the volume of gas required to get two divers from their deepest point, whilst also having their longest "decompression" obligation, from depth, to the surface, whilst sharing air and completing all safety / decompression stops on the way.
For info : when you move into the technical diving arena when using DIR principles Minimum Gas is re-defined to get you to your "next source of gas", i.e. the deco bottle. If the gas had to get you all the way to the surface, it would be a huge volume and quickly you would find technical diving impossible!!
Hypothetical Scenario
To try and explain what the DIR definition means in practice, lets use a fairly straight-foward scenario. Lets say my numpty buddy loses all of his gas because he has swam into the door frame of a wreck and has smashed both of his 1st stage regulators, he will come swimming over to me, I'll give him my spare regulator and we will head for the surface.
On the way we will have our first deep stop at 50% of our max depth for one minute. We will then have an additional 1 minute stop every 3m on the way up (other diving philosophies use the standard 3 minute / 6m safety stop) and then we will hit the surface and he can breathe the air.
From the point at which he starts breathing my spare regulator, to the point at which he breathes the atmosphere - I need that amount of gas as my reserve, that's my minimum gas that I will partition as a reserve when I enter the water.
How Do I Work Out My Reserve Volume?
To work out this volume of gas, you first need to know the rate at which your buddy and yourself consume your gas. This is often referred to as your SAC rate (surface air consumption) or RMV (respiratory minute volume). If you don't know this, a safe estimate is to use 25 lpm (litres per minute).
The next bit is simple maths, if you know the rate of gas consumption (say 25 lpm) and you know your depth (say 35m) and you know how long you are at depth (say 20 minutes) you can calculate the gas volume requirement.
Using the numbers just stated in this paragraph, the total gas volume is :
25 (lpm) x 4.5 (35m in ATM) x 20 (mins) = 2,250 l
But I need the gas needed to get up, not stay down...
Now that you know the process for calculating the gas required to stay at a certain depth for a certain amount of time, its just a case of repeating it, but for smaller durations and for different depths to work out the gas we need to come up. What we are going to do is "plan a dive", but the dive is getting us from the bottom to the top.
All of this is two divers on the same gas supply, we also need to make some assumptions about the divers:
Diver 1 gas consumption rate = 25 lpm
Diver 2 gas consumption rate = 50 lpm (doubled due to stress - easily achieved, I personally have seen my own gas consumption rate hit 100 lpm when under stress)
If we were doing a 30m dive then the "ascent profile" could be described as:
3 min @ 30m (problem solving and launching an SMB)
1 min @ 15m (deep stop)
1 min @ 12m (1st stop 3m shallower for 1 minute)
1 min @ 9m (next stop 3m shallower for 1 minute)
1 min @ 6m (next stop 3m shallower for 1 minute)
1 min @ 3m (final stop 3m shallower for 1 minute)
We will ignore the travel time and gas consumed between the depths such as 9m to 6m because the gas consumed in this transition is going to be pretty small and fairly insignificant (we are not looking for an answer to the nearest litre in practice), but what we can't ignore is the ascent from the bottom, 30m, to 15m - that is going to take up a while to do that move, and we are at a reasonable depth, which means we will consume a non-insignificant amount of gas.
Assuming we ascend at 9m per minute, its still going to take us the best part of 2 minutes.
But how do you calculate the gas requirement for a changing depth? The easiest way to work this out is to average it and then use the gas calculation under the assumption that all the time is spent at that depth (to simulate the ascent).
The way I do it is to say "where am I after half the time it will take me to perform the move" - its going to take us about two minutes to move up to 15m, so half of this would be one minute. After one minute we will have ascended to 21m (because we are moving up at 9m/min from 30m). That's the depth we will use to make our "travelling gas" calculation (we are creating an artificial stop here).
So knowing this we can update our accent profile described above to include this, therefore the new profile is:
3 min @ 30m (problem solving)
2 min @ 21m (artificial stop)
1 min @ 15m (deep stop)
1 min @ 12m
1 min @ 9m
1 min @ 6m
1 min @ 3m
Now we can use our time x depth x sac formula to calculate the has required at each of these stops.
(the 75 lpm is the combined consumption rate of the unpanicked diver, plus the donating diver).
30m = 3 (mins) x 4.0 (ATM) x 75 (lpm) = 900 l
21m = 2 (mins) x 3.1 (ATM) x 75 (lpm) = 465 l
15m = 1 (mins) x 2.5 (ATM) x 75 (lpm) = 188 l
12m = 1 (mins) x 2.2 (ATM) x 75 (lpm) = 165 l
9m = 1 (mins) x 1.9 (ATM) x 75 (lpm) = 143 l
6m = 1 (mins) x 1.6 (ATM) x 75 (lpm) = 120 l
3m = 1 (mins) x 1.3 (ATM) x 75 (lpm) = 98 l
Now when you add up the gas required at each depth above it comes to a total of 2,079 litres. That sound like a lot doesn't it? That's almost 190 bar in a single 12l or 85 bar in twin-12s.
Sayy what?!
So if you were to go on a 30m dive with your buddy, and you both breathe 25 lpm (but your buddy's breathing rate doubles to 50 when under stress), you would jump in and once your SPG reaches around 200 bar you'd need to start heading up! If you didn't and waited until you passed that pressure, THEN your buddy loses his gas supply, you won't make it to the surface as you'll have consumed part of your reserve that you needed.
In practice, the above calculation does demonstrate a significant level of conservatism in that the "victim" has an elevated breathing rate for the entire ascent. In practice that would come down. I've also used two pretty high breathing rates, those could be applicable for new divers, but for more experienced divers it's overly cautious.
Using the exact same profile, but for two divers with a SAC of 16 LPM and 18 LPM, with the latter diver the victim (subjected to the doubled SAC) the volume requirement becomes:
30m = 3 x 4.0 (ATM) x 52 = 624 l
21m = 2 x 3.1 (ATM) x 52 = 322 l
15m = 1 x 2.5 (ATM) x 52 = 130 l
12m = 1 x 2.2 (ATM) x 52 = 115 l
9m = 1 x 1.9 (ATM) x 52 = 99 l
6m = 1 x 1.6 (ATM) x 52 = 83 l
3m = 1 x 1.3 (ATM) x 52 = 68 l
Total: 1,441 (120 bar in single 12, or 60 bar in twin-12s).
For information - thats the minimum gas I enforce when my buddy and I are diving, if I'm feeling "dived up" then I might round that down to 50 bar (more comfortable in water, lower SAC rate), but if I'm returning to diving after a long spell away from it, I will enforce the previous (85-90 bar) reserve (out-of-touch with diving, less comfortable in the water resulting in a higher SAC).
Conclusion
Hopefully from this article you can see the importance of having a robust reserve calculated, and sometimes the "just make sure you are back on the surface with 50 bar" might not be enough. You should be able to follow the maths I did in this article for using your own consumption to have a tailored reserve just for you.
I hope this has been an interesting read, any questions, let me know!
Divers, particularly technical (tekky) divers, generally all look the same in water (with their twinsets and black gear!). And as the gear is typically the same too, so it is quite possible to lose track of people and gear, above and below the water.
I recall a dive in Malta (so gin clear waters, nice and warm - in fact the very dive in the picture below) ... the return journey to the stern of the Um El Faroud had taken longer and consumed more gas than planned so I was getting edgy about my gas reserves (I was actually thinking about the gas reserves to get from 30m, when in fact we were at about 22m so I still had some extra margin). On the way back the team swam through the engine room - there was at least two other teams in there and I got split up from the team. I followed one twinsetted diver out and gave him the thumb (dive cancelled) but then he looked at me in shock, he gave me a "who are you?" type look - turns out I thumbed the wrong diver! I turned to my left and I spotted the one diver in my group in sidemount so I knew to head that way - in this situation no harm resulted, but my stress was running higher than it needed be. I was on the precipice of the incident pit and just holding myself back.
In the picture below, taken in Malta, there are four divers in the shot (that's me at the very back with the light!), three of us are wearing twinsets with a stage, one is sidemount. As you can see, its damn near impossible to tell the three twinsetted-divers apart!
Three twinsetted divers, one in sidemount ... so who's who? (Photograph by Steve Wilkinson)
Putting your initials on your cylinders, (back gas and stages) means they are uniquely identifiable to you. So things like finding your cylinder in the fill station, or even finding your buddy in a crowd when practising skills at a quarry far far easier.
Oh look it is Mr SB!
Before DiveSigns
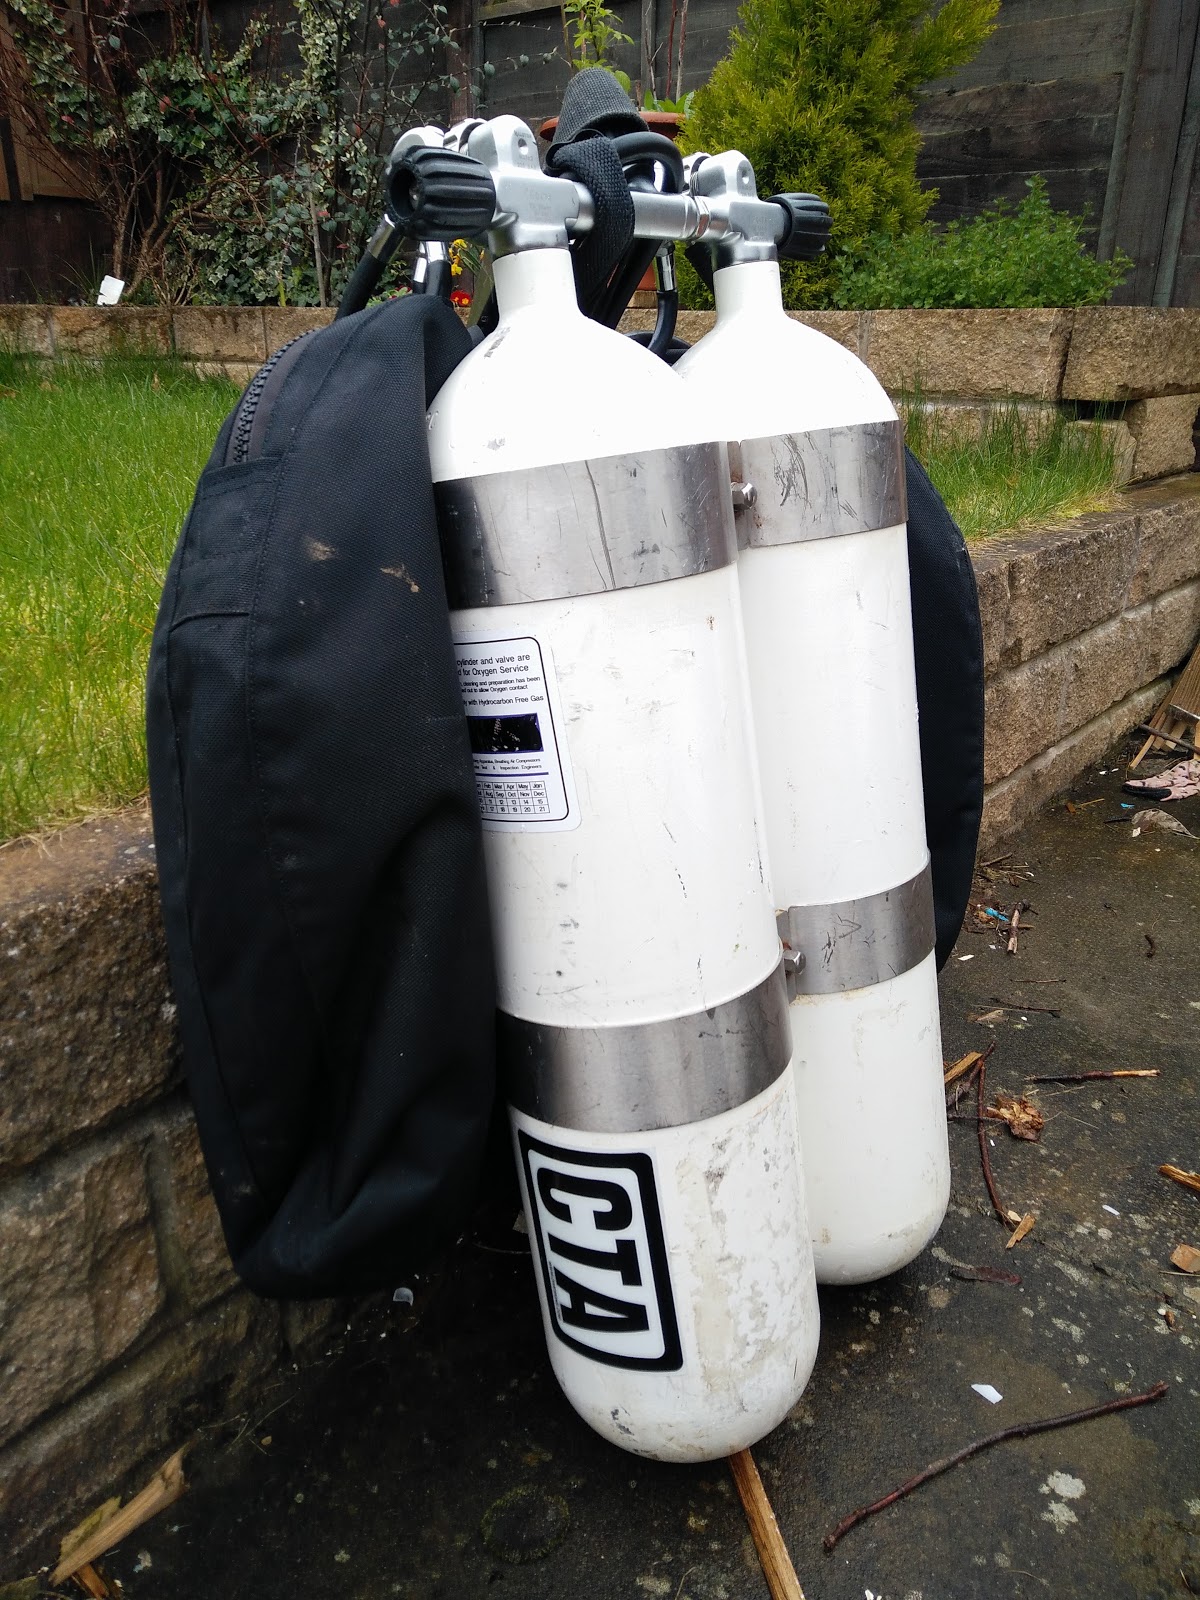
Initially there were just two options for marking cylinders, you could either paint initials on, or you could buy self-adhesive letters from Halfords that were originally intended for making up car registration plates. The drawback with the painted approach is that post-testing your 'marking' is almost guaranteed to be in a different position and not in the nice flat position along the length of the cylinders as shown in the picture above. I chose to buy the Halfords lettering ...
The stickers are typically very cheap, around 50-75p a letter. So you could mark up both sides of your cylinder for just a few quid. The first problem: they looked pants. I would use just three, say "CTA" and I had the problem of getting the lettering neatly lined up and equally spaced. Basically it looked naff, it certainly did when I did it!
The other problem is that the lettering is very thin, probably 1-2 mm at most and it didn't take many dives before it was getting scuffed and peeling away. It wasn't a practical solution.
Halfords stickers - big thumbs down
DIR Direct Stickers
As I started to get into following Global Underwater Explorers (GUE) more and more, I found that the primary outlet for the gear (particularly the non-primary gear like wings, but more accessory type stuff) was DIR Direct. Finding stickers at DIRdirect.com I thought that I was on to a winner. I bought stickers to make up my full name "CHRIS". I also bought stickers for 21m to put onto my deco bottle.
In the picture below, you can see the 21m sticker is getting torn and ruined. This wasn't after a few years of diving either. Again these are not recommended.
NOTE: DIRdirect no longer sell these stickers.
DIR Direct Sticker: ruined
GUE Stickers
So with both the Halfords stickers and DIRDirect.com stickers quickly scuffed and pealing off before I even got to the dive sites, my next choice was to look at the stickers GUE made. Surely if my training organisation makes them, and they do world record dives, surely these will cut the mustard?
The GUE stickers are definitely a step up, these now have a reflective backing which shows up on either camera flashes or if a torch illuminates them. The laminate material that the stickers are made from are definitely better than both of the previous ones, and does have some degree from resistance - the sticker in the picture below is 3 years old.
You can see in the picture below, the stickers are definitely more robust than both the Halfords stickers and the DIRdirect stickers.
GUE Stickers: better
Enter the scene: Dive Signs
Brand new stickers ...
About DiveSigns
I first discovered DiveSigns as they were a sponsor on the direxplorers forum. Broadly speaking, DiveSigns has these main products:
SOLAS Stickers - these are intended for DSMBs to aid visibility
Diver Identification stickers - typically with your initials and attached to cylinders and scooters. There is also an Explorer version that is higher contrast.
Stealth stickers - like the Identification stickers, these are usually your initials, but the materials used to make the stickers are all black, but show up nicely when illuminated by torches
Rebreather stickers - OXYGEN and DILUENT with colouring of green or white to be put on either the RB case or along the cylinders
I've used the first three. The SOLAS stickers are on my DSMBs, The Diver Identification stickers are on all my cylinders (twinsets, stages and argon bottle) and the stealth sticker is on the canister of my canister light.
In the images below I'm showing the stealth stickers. These are great on canister torches where you might want the sticker to be a bit more subtle. In daylight the stickers look very dark in a two-tone black effect. But the minute a light is on them the lettering shows up like Casper!
In the image below, I'm showing off the worst of my Diver Identification Stickers. The stickers below have been removed and replaced on the cylinders several times (during testing) but have been on since 2008!
Diver Identification Stickers
The last set of stickers are the SOLAS stickers. These are intended to be highly visible and go on DSMBs. There is also the option to have your mobile number on the sticker, which I have but redacted in the image below. This is a really nice touch - if for any reason you lose your DSMB, you might just get a call about it!
DSMB SOLAS Stickers
The original version of DiveSigns stickers had the self-adhesive backing and reflective cover with the desired lettering stuck on top (to form a two layered product). The drawback with this approach is that if you are in a situation where a lot of scraping occurs, typically in wrecks or caves, or at inland quarries during the bad-season, it is vulnerable to impact and tearing.
This isn't something I've actually had a problem with personally - look at the picture above of the stickers on my twinset - whilst they are scuffed they are far from falling off! - although Mark does have some cave diving customers. And when I say cave divers, I'm talking about the ones that go into sumps, crawling through holes 50% the size of themselves, with damn-near negative values for visibility, grinding their way through holes along rocks and gravel. So in these cases they have reported the stickers becoming scratched and damaged.
Mark took this feedback on and came up with Mk2...
DiveSigns (Mk2)
The next revision to the design was to apply an armoured coating, a protective layer over the lettering and adhesive-reflective backing to give that extra layer of resilience against damage. I was actually with Mark when he brought a sample of these new armoured stickers and we got a rock from the waters edge at Stoney Cove and intentionally tried to scratch the stickers - it just couldn't be done!
This high endurance laminate layer is actually designed for use on Motor Cross, which take a pounding but they hold up perfectly.
I noticed that when attaching these latest stickers, they are considerably thicker which makes them very easy to handle. When attaching to my cylinders, I ripped off the backing completely, then the midpoint along the length of the sticker was then gently pressed on to the cylinder where I wanted it. I then pressed each half in turn to secure it to the cylinder.
The great thing with the stiffness is that you don't have to worry about getting air bubbles (think back to high school when you had to laminate your text books and you would get those inevitable trapped air bubbles - this doesn't happen here!)
On one time, I didn't get my stickers quite as straight as I wanted (I'm a GUE diver, it HAS to be flat :) ) so I could just rip the sticker off easily enough and re-attach - the glue isn't stick instantly, you do have plenty of opportunity to tweak if you need.
Attaching the sticker
Interview with DiveSigns
I was very fortunate to get some time with Mark from DiveSigns. I took the opportunity to find out a bit more about the product and the company:
[DITF]: So Mark, what was the inspiration for starting DiveSigns?
[DS]: After almost swimming off with the wrong team a number of times on dark, low-vis dives in the English Channel where everyone was wearing identical kit and suits, I thought how useful it would be if pre-made reflective diver identification stickers were available. MOD stickers were easy enough to buy but nobody made ID stickers for divers. So I had what seemed like a good idea and started making some pretty basic stickers which were all assembled by hand. After a couple of months of selling these basic stickers via forums, our website was put together and we bought some professional equipment to take the products to the next level.
[DITF]: Can you remember your first order?
The first stickers I ever made were tried out at Vobster Quay Diving Centre with Clare and Alistair Pooley back in 2005. A guy from Yorkshire Divers asked if I would like a website setup so I bought the .com and .co.uk domains after coming up with the name and the website went live in May 2006.
[DITF]: How do you make the stickers?
[DS]: Orders are produced by cutting out the designs on a vinyl plotter then hand assembling the vinyl / reflective layers and finally laminating with a very high endurance film so the sticker is protected. The stickers are then trimmed. Everything apart from the plotting of the design is done by hand.
[DITF]: I get the diver identification stickers, what's the point of the SOLAS stickers?
[DS]: I invented SOLAS diver identification stickers for DSMBs. A small number of DSMBs came with a strip of SOLAS tape attached so I thought it would be a good idea to combine the high visibility of SOLAS tape with black vinyl lettering. So if your DSMB has no SOLAS tape you could order a nice big strip with your name on. Dive boat skippers like the SOLAS stickers as it makes identifying the divers so much easier. We also make plain black text stickers that can be stuck on to a factory fitted SOLAS tape strip. Generally DSMBs only have 2" wide SOLAS tape attached whereas we use 3" wide tape which is better!
The SOLAS stickers are covered with the same high-endurance laminating film as the normal reflective diver ID and MOD stickers.
We only used to laminate the SOLAS stickers to prevent the letters from peeling off when continually being folded or rolled up when the DSMB was stowed away. In 2015 we found a great high-endurance laminating film that we now use to protect all of the stickers we produce.
[DITF]: So why did you suddenly start adding a lamination to your stickers?
[DS]: I started laminating the ID and MOD stickers after a customer complained after trashing a sticker. I found the right laminate, bought a press and remade his entire order free of charge. He was extremely happy with his new stickers. They are very robust now.
The old un-laminated stickers lasted well with a bit of care but the odd knock was unavoidable. Not any more. I tested the new ones by repeatedly bashing my AL80 onto stickers fitted to my twinset.
I can't see how the current stickers could be damaged in normal use.
[DIFT]: Have you ever had an order that made you go WTF?
[DS]: We have had to make some rather rude SOLAS stickers in the past and some very long ones.
[DITF]: What has been your coolest customer?
[DS]: We have supplied stickers to scientific research teams on the Great Barrier Reef (for the University of Queensland) and also to the large research vessel that was hosting David Attenborough on his most recent TV series. Plus US government agencies and a South Korean Navy rescue dive team. Among others.
The stickers also appeared in the Apeks advertisement "Technically Inspired".
Whenever I watch a dive video, I'm always keeping an eye out just in case I spot one of my DiveSigns!
[DIFT]: You clearly spotted a market for a product, where can you see the future for DiveSigns?
[DS]: We have always been more focused on the worldwide Tek/Cave/RB Diving community but we would like to cater for recreational divers as well. Our SOLAS stickers stick very nicely to rubber tank boots for instance and every BSAC & PADI dive club in the UK have many divers using these maybe with mesh over the tank. SOLAS stickers on the boots would work very well.
Having the sticker on the boot would also mean that it would not have to be removed at tank testing time.
[DITF]: Ah yes, excellent idea, my twinset has just been in for test and the stickers were ripped off as part of test, but they kindly stuck them back on, although stuck on the back of the cylinders (facing away from the diver) so you can only see them if you are above me!
[DS]: I have just joined a BSAC club so I will see what they think. They might not have even heard of us.
[DITF]: Well if they haven't heard of you they have been living under a rock, and after they've seen your incredible stickers, I'm sure they will love your products as much as I do!
Other DiveSigns Products
Mark isn't shy about innovation or product development, Mark has experimented with NFC tags inside of his stickers which have been programmed to push status updates to Facebook whenever he arrived at certain places, such as his gym.
If you've got a novel idea, Mark will certainly be eager to help if he can!
Tips & Advice
The following sections are provided on the DiveSigns website, I've made a copy here for completeness.
Attaching DSMB stickers
Divesigns SOLAS stickers will stick to your DSMB without any extra gluing providing the DSMB surface is thoroughly cleaned prior to application.
Wash the DSMB with warm soapy water to remove any salt deposits/grease and dry.
Clean with a solvent cleaning product (Cotol or similar)
Deflate the DSMB completely, lay it on a flat surface and then apply the sticker.
The self-adhesive must then be given 36 to 48 hours to stick to the DSMB surface.
Place a hardback book over the sticker with a heavy object on top for the duration of the sticking time.
Test the stickers in the pool/bath/bucket of water to ensure that they have stuck correctly. If the stickers peel off of the DSMB they will need to be glued on as described below.
Re-attaching DSMB stickers
Make sure DSMB is clean, free from salt deposits and dry.
Deflate DSMB and lay it flat. Decide where you want to put the sticker then clean the area with Cotol (or similar solvent product) on a cloth.
Remove backing paper from sticker. The stickers are self-adhesive backed so your fingers will stick to it. The easiest way to remove the backing paper is to lay the sticker flat, peel up one corner of the backing paper, hold the sticker with a pen/pencil on the revealed sticky corner then fully remove the paper.
Using the sticker backing paper as a size guide, apply a thin layer of Aquasure to the DSMB.
Apply a thin even layer of Aquasure/Stormsure over the entire back of the sticker. Then apply the sticker to the DSMB. Firmly smooth out the sticker, from the centre out to the edges. Any excess glue can be wiped off with Cotol on your cloth. Finish off by going all round the edge of the sticker with the Cotol cloth to get a professional finish with no mess.
Leave to cure over night.
Go diving.
Removing stickers
If you ever need to remove Dive Signs stickers, here's a guide, again based on the guidance on the Dive Signs website with some of my extra comments:
Use a hair dryer or heat gun for heat shrink to warm up and soften the glue on the back of the stickers. It will take a few minutes to get the glue soft enough, keep the heat moving over all of the sticker
Heat gun
Start peeling from the corner, keeping the heat on ahead of the peeling
If you keep the heat everywhere you should get the sticker off in virtually one piece
Very damaged stickers (like mine in the above picture - NOTE these are the original version, not the new armoured ones) can fragment and the silver reflective backing may get left behind on the cylinder
Remainders
You can see above, taken with the flash on, the reflective parts of the sticker that remain. Along with these fragments is the sticky residue of the adhesive
To get this off, first cover the affected areas with masking tape
Masking tape
Now use the hairdryer or heat gun again to soften the adhesive then tear off the masking tape. This will take off the adhesive
For any adhesive that STILL remains, use some WD40 and some hard scrubbing to clean up the surface
Use WD40
Conclusion
Mark has come up with some great products, they are robust and perform brilliantly - I personally love the stealth stickers, they just appear as black, but if you light them up ... BOOM ! There they are clear as day.
So how reflective are the stickers? Check this out with the flash on ... the picture almost looks like a binary (black-white only) photograph, but its not, its full colour!
Ultra-reflective!
The original stickers had great durability, these new armoured ones are going to stand up to the most brutal conditions and keep on looking good (and hopefully avoiding following the wrong team which inspired Mark in the first place!)
Stickers start at £2 typically, with each extra letter £0.50 extra. This means that a typical diver with a cylinder and primary light (in stealth) wanting 3 letters (CTA in my case for example) is just £8.50 (taken directly from the website). I think this represents fantastic value for money and would make a great gift to a fellow diver.
Mark also has some brilliantly innovative products such as the Gas Analysis stickers ... no longer is duck tape with faded writing going to be stuck to the neck of your cylinders!
I cannot recommend these stickers enough, I will be buying up more in the near future to finish labelling my ever-growing collection of cylinders! The Wheelie Bin stickers are also calling too! I think that any of the other sticker options, are inferior to a level that can't really be described - just look at the pictures. I wouldn't recommend using anything else other than stickers from DiveSigns. I believe these to be the only solution that should be considered. To that end, I will be adding a link to the Dive Signs website on my front page to take you straight to the website.
Ethics Statement
Prior to conducting this review I have purchased and used the stickers for my own use (circa 2008 - see twin-set photograph). At the end of 2015, Mark asked me to provide a public review of his product and given my previous experience I was delighted to put this together. DiveIntoTheFold was not paid for this review, other than providing samples of the most recent incarnation of the product that I was unfamiliar with. The views, opinions and experiences with the stickers (including competitive solutions) are all my own.