DiveSigns

Showing posts with label review. Show all posts

Tuesday, 12 July 2016

Review : DiveSigns Alien Glow-In-The-Dark Stickers

Background

It didn't feel like 5 minutes ago that I was reviewing the line up of products on offer from Dive Signs, and I explicitly remember thinking to myself as I was writing it that Mark is always innovating (in particular I was thinking about the NFC tags he dabbled with). Well, he's gone and done it again.
In June 2016, Mark put out feelers about his latest idea ....


New Product: Alien stickers

The Alien stickers are the result of a problem faced by underwater videographers and photographers : when using video lights or strobes, the stickers are just too good and can either cause distraction (best case) in the frame, or can destroy the image due to the high reflectivity.

Look at the reflector on my drysuit arm!!
So on Saturday June 2nd 2016, Mark and I went for a dive out of Swanage on the Kyarra (actually as part of my joint birthday and stag-party - if you are interested in reading about all of our shenanigans then have a read here). Conditions were pretty horrific if I'm being honest. On the surface we had 4-5m swells, winds were around 30 mph - it was pretty hellish!

When we did eventually get in the water, we were met by a dark-green world with very strong currents.


Deck bollards on the Kyarra
You can see in the picture above, its dingy green and we are only at about 24m. So Mark and I did our dive. I was using my GoPro trying to shoot some video of the dive. The images in this review are stills taken from the video of the GoPro Hero.


Alien stickers on Mark


Alien stickers on Mark


Alien stickers on Mark

Conclusion

Due to the grim greeny-ness of the conditions we couldn't see any glow-in-the-dark effect. Having said that, I could clearly read the stickers on Marks' twinset. It was only once Mark was getting too far ahead that I was losing sight of ALL of him that the stickers became unreadable (look at the first picture of the three in a row above, you can see a diver ahead of Mark - that's what I mean).

Better conditions are needed to truly evaluate how glowy the glow in the dark stickers are in the water, but in person they are like first photograph at the top of this blog! That image is not photo shopped or edited, they really are that bright (if not brighter!!)

If you are going to be diving with either videographers or photographers, its worth using these stickers, they are not ultra-reflective and so wont saturate the image, but they are still very clearly legible  even under the grim conditions we had in Swanage.

It is likely that in a cave environment, you would be able to see your buddy purely off the sticker.

Another awesome product from Dive Signs, another recommendation from Dive Into The Fold!

Thursday, 14 April 2016

Review: DiveSigns Stickers

Why do I even need stickers?

Divers, particularly technical (tekky) divers, generally all look the same in water (with their twinsets and black gear!). And as the gear is typically the same too, so it is quite possible to lose track of people and gear, above and below the water.

I recall a dive in Malta (so gin clear waters, nice and warm - in fact the very dive in the picture below) ... the return journey to the stern of the Um El Faroud had taken longer and consumed more gas than planned so I was getting edgy about my gas reserves (I was actually thinking about the gas reserves to get from 30m, when in fact we were at about 22m so I still had some extra margin). On the way back the team swam through the engine room - there was at least two other teams in there and I got split up from the team. I followed one twinsetted diver out and gave him the thumb (dive cancelled) but then he looked at me in shock, he gave me a "who are you?" type look - turns out I thumbed the wrong diver! I turned to my left and I spotted the one diver in my group in sidemount so I knew to head that way - in this situation no harm resulted, but my stress was running higher than it needed be. I was on the precipice of the incident pit and just holding myself back.


In the picture below, taken in Malta, there are four divers in the shot (that's me at the very back with the light!), three of us are wearing twinsets with a stage, one is sidemount. As you can see, its damn near impossible to tell the three twinsetted-divers apart!

Three twinsetted divers, one in sidemount ... so who's who? (Photograph by Steve Wilkinson)
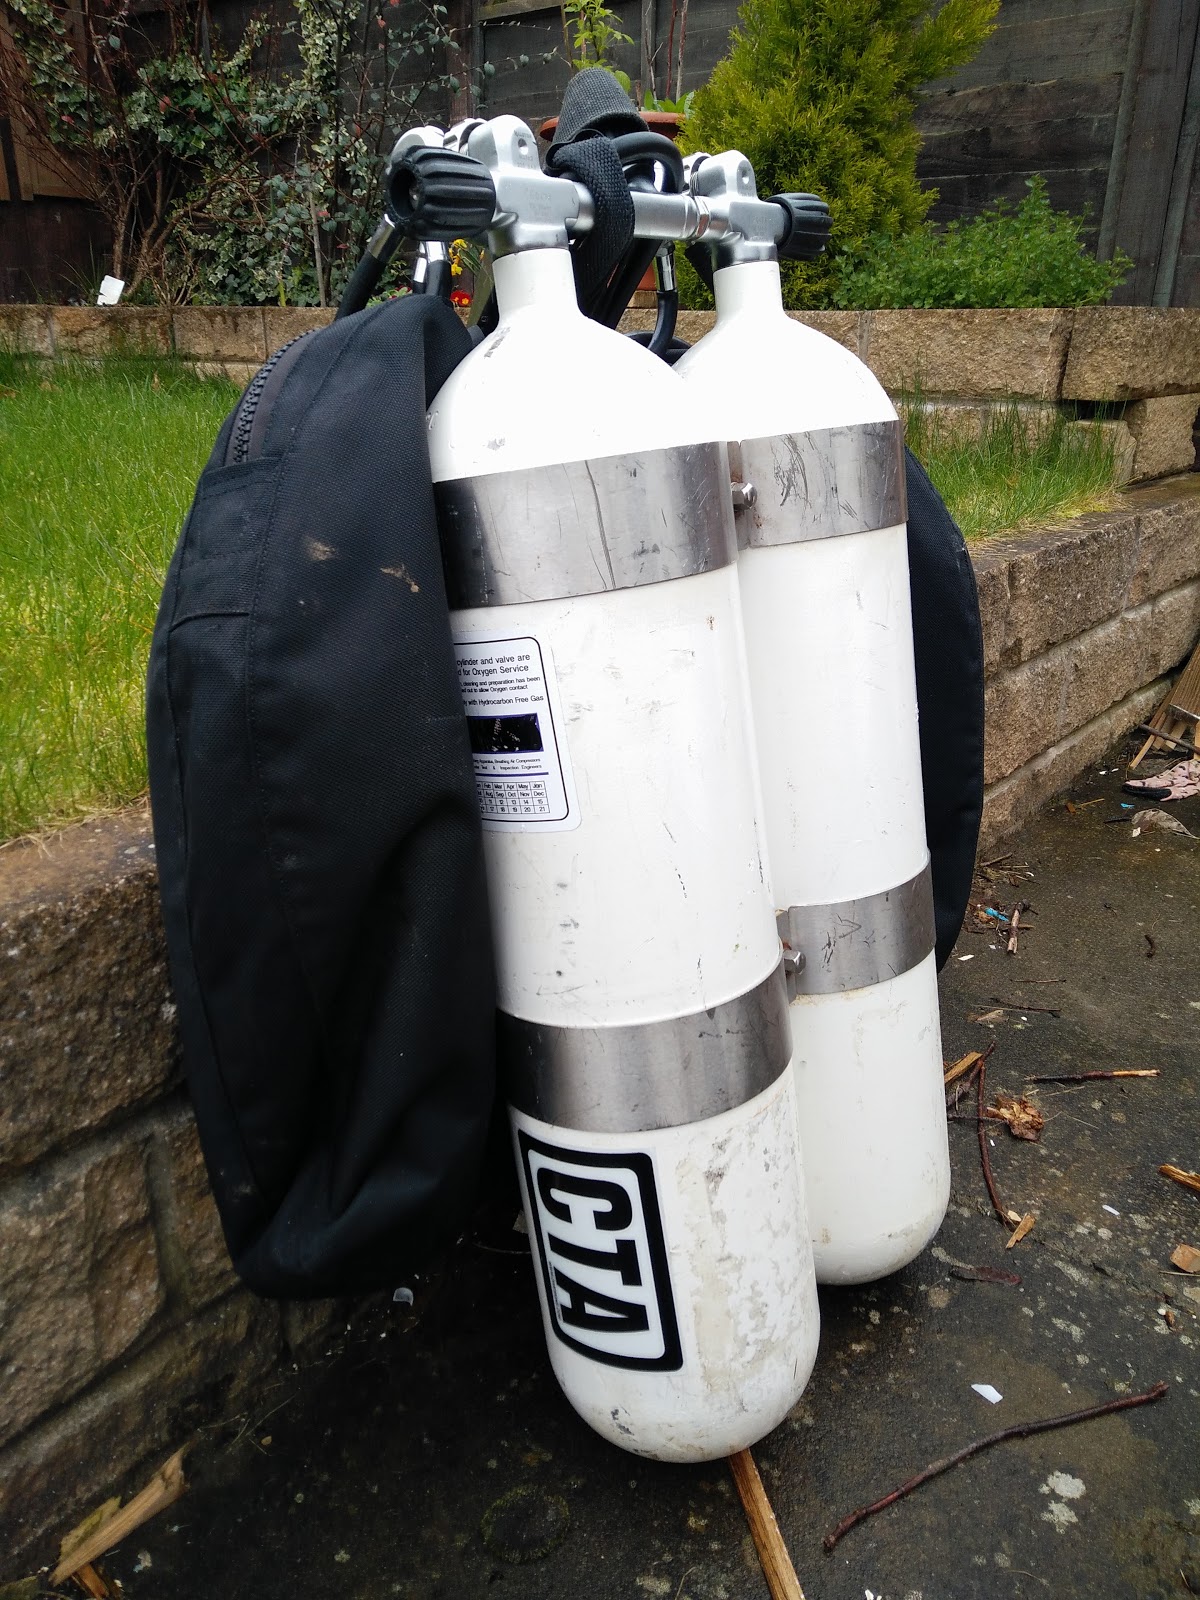
Putting your initials on your cylinders, (back gas and stages) means they are uniquely identifiable to you. So things like finding your cylinder in the fill station, or even finding your buddy in a crowd when practising skills at a quarry far far easier.

Oh look it is Mr SB!

Before DiveSigns

Initially there were just two options for marking cylinders, you could either paint initials on, or you could buy self-adhesive letters from Halfords that were originally intended for making up car registration plates. The drawback with the painted approach is that post-testing your 'marking' is almost guaranteed to be in a different position and not in the nice flat position along the length of the cylinders as shown in the picture above. I chose to buy the Halfords lettering ...

The stickers are typically very cheap, around 50-75p a letter. So you could mark up both sides of your cylinder for just a few quid. The first problem: they looked pants. I would use just three, say "CTA" and I had the problem of getting the lettering neatly lined up and equally spaced. Basically it looked naff, it certainly did when I did it!

The other problem is that the lettering is very thin, probably 1-2 mm at most and it didn't take many dives before it was getting scuffed and peeling away. It wasn't a practical solution.

Halfords stickers - big thumbs down

DIR Direct Stickers

As I started to get into following Global Underwater Explorers (GUE) more and more, I found that the primary outlet for the gear (particularly the non-primary gear like wings, but more accessory type stuff) was DIR Direct. Finding stickers at DIRdirect.com I thought that I was on to a winner. I bought stickers to make up my full name "CHRIS". I also bought stickers for 21m to put onto my deco bottle.

In the picture below, you can see the 21m sticker is getting torn and ruined. This wasn't after a few years of diving either. Again these are not recommended.

NOTE: DIRdirect no longer sell these stickers.

DIR Direct Sticker: ruined

GUE Stickers

So with both the Halfords stickers and DIRDirect.com stickers quickly scuffed and pealing off before I even got to the dive sites, my next choice was to look at the stickers GUE made. Surely if my training organisation makes them, and they do world record dives, surely these will cut the mustard?

The GUE stickers are definitely a step up, these now have a reflective backing which shows up on either camera flashes or if a torch illuminates them. The laminate material that the stickers are made from are definitely better than both of the previous ones, and does have some degree from resistance - the sticker in the picture below is 3 years old.

You can see in the picture below, the stickers are definitely more robust than both the Halfords stickers and the DIRdirect stickers.

GUE Stickers: better

Enter the scene: Dive Signs

Brand new stickers ...

About DiveSigns

I first discovered DiveSigns as they were a sponsor on the direxplorers forum. Broadly speaking, DiveSigns has these main products:
  1. SOLAS Stickers - these are intended for DSMBs to aid visibility
  2. Diver Identification stickers - typically with your initials and attached to cylinders and scooters. There is also an Explorer version that is higher contrast.
  3. Stealth stickers - like the Identification stickers, these are usually your initials, but the materials used to make the stickers are all black, but show up nicely when illuminated by torches
  4. Rebreather stickers - OXYGEN and DILUENT with colouring of green or white to be put on either the RB case or along the cylinders
I've used the first three. The SOLAS stickers are on my DSMBs, The Diver Identification stickers are on all my cylinders (twinsets, stages and argon bottle) and the stealth sticker is on the canister of my canister light.

In the images below I'm showing the stealth stickers. These are great on canister torches where you might want the sticker to be a bit more subtle. In daylight the stickers look very dark in a two-tone black effect. But the minute a light is on them the lettering shows up like Casper!


In the image below, I'm showing off the worst of my Diver Identification Stickers. The stickers below have been removed and replaced on the cylinders several times (during testing) but have been on since 2008!

Diver Identification Stickers

The last set of stickers are the SOLAS stickers. These are intended to be highly visible and go on DSMBs. There is also the option to have your mobile number on the sticker, which I have but redacted in the image below. This is a really nice touch - if for any reason you lose your DSMB, you might just get a call about it!

DSMB SOLAS Stickers

The original version of DiveSigns stickers had the self-adhesive backing and reflective cover with the desired lettering stuck on top (to form a two layered product). The drawback with this approach is that if you are in a situation where a lot of scraping occurs, typically in wrecks or caves, or at inland quarries during the bad-season, it is vulnerable to impact and tearing.

This isn't something I've actually had a problem with personally - look at the picture above of the stickers on my twinset - whilst they are scuffed they are far from falling off! - although Mark does have some cave diving customers. And when I say cave divers, I'm talking about the ones that go into sumps, crawling through holes 50% the size of themselves, with damn-near negative values for visibility, grinding their way through holes along rocks and gravel. So in these cases they have reported the stickers becoming scratched and damaged. 

Mark took this feedback on and came up with Mk2...

DiveSigns (Mk2)

The next revision to the design was to apply an armoured coating, a protective layer over the lettering and adhesive-reflective backing to give that extra layer of resilience against damage. I was actually with Mark when he brought a sample of these new armoured stickers and we got a rock from the waters edge at Stoney Cove and intentionally tried to scratch the stickers - it just couldn't be done!

This high endurance laminate layer is actually designed for use on Motor Cross, which take a pounding but they hold up perfectly.


I noticed that when attaching these latest stickers, they are considerably thicker which makes them very easy to handle. When attaching to my cylinders, I ripped off the backing completely, then the midpoint along the length of the sticker was then gently pressed on to the cylinder where I wanted it. I then pressed each half in turn to secure it to the cylinder.

The great thing with the stiffness is that you don't have to worry about getting air bubbles (think back to high school when you had to laminate your text books and you would get those inevitable trapped air bubbles - this doesn't happen here!)

On one time, I didn't get my stickers quite as straight as I wanted (I'm a GUE diver, it HAS to be flat :) ) so I could just rip the sticker off easily enough and re-attach - the glue isn't stick instantly, you do have plenty of opportunity to tweak if you need.

Attaching the sticker

Interview with DiveSigns

I was very fortunate to get some time with Mark from DiveSigns. I took the opportunity to find out a bit more about the product and the company:

[DITF]: So Mark, what was the inspiration for starting DiveSigns?

[DS]: After almost swimming off with the wrong team a number of times on dark, low-vis dives in the English Channel where everyone was wearing identical kit and suits, I thought how useful it would be if  pre-made reflective diver identification stickers were available. MOD stickers were easy enough to buy but nobody made ID stickers for divers. So I had what seemed like a good idea and started making some pretty basic stickers which were all assembled by hand. After a couple of months of selling these basic stickers via forums, our website was put together and we bought some professional equipment to take the products to the next level.

[DITF]: Can you remember your first order?

The first stickers I ever made were tried out at Vobster Quay Diving Centre with Clare and Alistair Pooley back in 2005. A guy from Yorkshire Divers asked if I would like a website setup so I bought the .com and .co.uk domains after coming up with the name and the website went live in May 2006.

[DITF]: How do you make the stickers?

[DS]: Orders are produced by cutting out the designs on a vinyl plotter then hand assembling the vinyl / reflective layers and finally laminating with a very high endurance film so the sticker is protected. The stickers are then trimmed. Everything apart from the plotting of the design is done by hand.

[DITF]: I get the diver identification stickers, what's the point of the SOLAS stickers?

[DS]: I invented SOLAS diver identification stickers for DSMBs. A small number of DSMBs came with a strip of SOLAS tape attached so I thought it would be a good idea to combine the high visibility of SOLAS tape with black vinyl lettering. So if your DSMB has no SOLAS tape you could order a nice big strip with your name on. Dive boat skippers like the SOLAS stickers as it makes identifying the divers so much easier. We also make plain black text stickers that can be stuck on to a factory fitted SOLAS tape strip. Generally DSMBs only have 2" wide SOLAS tape attached whereas we use 3" wide tape which is better!

The SOLAS stickers are covered with the same high-endurance laminating film as the normal reflective diver ID and MOD stickers.

We only used to laminate the SOLAS stickers to prevent the letters from peeling off when continually being folded or rolled up when the DSMB was stowed away. In 2015 we found a great high-endurance laminating film that we now use to protect all of the stickers we produce.

[DITF]: So why did you suddenly start adding a lamination to your stickers?

[DS]: I started laminating the ID and MOD stickers after a customer complained after trashing a sticker. I found the right laminate, bought a press and remade his entire order free of charge. He was extremely happy with his new stickers.  They are very robust now.

The old un-laminated stickers lasted well with a bit of care but the odd knock was unavoidable. Not any more. I tested the new ones by repeatedly bashing my AL80 onto stickers fitted to my twinset.

I can't see how the current stickers could be damaged in normal use.

[DIFT]: Have you ever had an order that made you go WTF?

[DS]: We have had to make some rather rude SOLAS stickers in the past and some very long ones.

[DITF]: What has been your coolest customer?

[DS]: We have supplied stickers to scientific research teams on the Great Barrier Reef (for the University of Queensland) and also to the large research vessel that was hosting David Attenborough on his most recent TV series. Plus US government agencies and a South Korean Navy rescue dive team. Among others.

The stickers also appeared in the Apeks advertisement "Technically Inspired".


Whenever I watch a dive video, I'm always keeping an eye out just in case I spot one of my DiveSigns!

[DIFT]: You clearly spotted a market for a product, where can you see the future for DiveSigns?

[DS]: We have always been more focused on the worldwide Tek/Cave/RB  Diving community but we would like to cater for recreational divers as well. Our SOLAS stickers stick very nicely to rubber tank boots for instance and every BSAC & PADI dive club in the UK have many divers using these maybe with mesh over the tank. SOLAS stickers on the boots would work very well.

Having the sticker on the boot would also mean that it would not have to be removed at tank testing time.

[DITF]: Ah yes, excellent idea, my twinset has just been in for test and the stickers were ripped off as part of test, but they kindly stuck them back on, although stuck on the back of the cylinders (facing away from the diver) so you can only see them if you are above me!

[DS]: I have just joined a BSAC club so I will see what they think. They might not have even heard of us.

[DITF]: Well if they haven't heard of you they have been living under a rock, and after they've seen your incredible stickers, I'm sure they will love your products as much as I do!

Other DiveSigns Products

Mark isn't shy about innovation or product development, Mark has experimented with NFC tags inside of his stickers which have been programmed to push status updates to Facebook whenever he arrived at certain places, such as his gym.

If you've got a novel idea, Mark will certainly be eager to help if he can!

Tips & Advice

The following sections are provided on the DiveSigns website, I've made a copy here for completeness.

Attaching DSMB stickers

Divesigns SOLAS stickers will stick to your DSMB without any extra gluing providing the DSMB surface is thoroughly cleaned prior to application. 
  1. Wash the DSMB with warm soapy water to remove any salt deposits/grease and dry.
  2. Clean with a solvent cleaning product (Cotol or similar)
  3. Deflate the DSMB completely, lay it on a flat surface and then apply the sticker. 
  4. The self-adhesive must then be given 36 to 48 hours to stick to the DSMB surface. 
  5. Place a hardback book over the sticker with a heavy object on top for the duration of the sticking time. 
  6. Test the stickers in the pool/bath/bucket of water to ensure that they have stuck correctly. If the stickers peel off of the DSMB they will need to be glued on as described below.

Re-attaching DSMB stickers

  1. Make sure DSMB is clean, free from salt deposits and dry.
  2. Deflate DSMB and lay it flat. Decide where you want to put the sticker then clean the area with Cotol (or similar solvent product) on a cloth.
  3. Remove backing paper from sticker. The stickers are self-adhesive backed so your fingers will stick to it. The easiest way to remove the backing paper is to lay the sticker flat, peel up one corner of the backing paper, hold the sticker with a pen/pencil on the revealed sticky corner then fully remove the paper.
  4. Using the sticker backing paper as a size guide, apply a thin layer of Aquasure to the DSMB.
  5. Apply a thin even layer of Aquasure/Stormsure over the entire back of the sticker. Then apply the sticker to the DSMB. Firmly smooth out the sticker, from the centre out to the edges. Any excess glue can be wiped off with Cotol on your cloth. Finish off by going all round the edge of the sticker with the Cotol cloth to get a professional finish with no mess.
  6. Leave to cure over night.
  7. Go diving.

Removing stickers

If you ever need to remove Dive Signs stickers, here's a guide, again based on the guidance on the Dive Signs website with some of my extra comments:
  1. Use a hair dryer or heat gun for heat shrink to warm up and soften the glue on the back of the stickers. It will take a few minutes to get the glue soft enough, keep the heat moving over all of the sticker
  2. Heat gun
  3. Start peeling from the corner, keeping the heat on ahead of the peeling
  4. If you keep the heat everywhere you should get the sticker off in virtually one piece
  5. Very damaged stickers (like mine in the above picture - NOTE these are the original version, not the new armoured ones) can fragment and the silver reflective backing may get left behind on the cylinder
  6. Remainders
  7. You can see above, taken with the flash on, the reflective parts of the sticker that remain. Along with these fragments is the sticky residue of the adhesive
  8. To get this off, first cover the affected areas with masking tape
  9. Masking tape
  10. Now use the hairdryer or heat gun again to soften the adhesive then tear off the masking tape. This will take off the adhesive
  11. For any adhesive that STILL remains, use some WD40 and some hard scrubbing to clean up the surface
  12. Use WD40

Conclusion

Mark has come up with some great products, they are robust and perform brilliantly - I personally love the stealth stickers, they just appear as black, but if you light them up ... BOOM ! There they are clear as day.


So how reflective are the stickers? Check this out with the flash on ... the picture almost looks like a binary (black-white only) photograph, but its not, its full colour!

Ultra-reflective!
The original stickers had great durability, these new armoured ones are going to stand up to the most brutal conditions and keep on looking good (and hopefully avoiding following the wrong team which inspired Mark in the first place!)

Stickers start at £2 typically, with each extra letter £0.50 extra. This means that a typical diver with a cylinder and primary light (in stealth) wanting 3 letters (CTA in my case for example) is just £8.50 (taken directly from the website). I think this represents fantastic value for money and would make a great gift to a fellow diver.

Mark also has some brilliantly innovative products such as the Gas Analysis stickers ... no longer is duck tape with faded writing going to be stuck to the neck of your cylinders!

I cannot recommend these stickers enough, I will be buying up more in the near future to finish labelling my ever-growing collection of cylinders! The Wheelie Bin stickers are also calling too! I think that any of the other sticker options,  are inferior to a level that can't really be described - just look at the pictures. I wouldn't recommend using anything else other than stickers from DiveSigns. I believe these to be the only solution that should be considered. To that end, I will be adding a link to the Dive Signs website on my front page to take you straight to the website.

Ethics Statement

Prior to conducting this review I have purchased and used the stickers for my own use (circa 2008 - see twin-set photograph). At the end of 2015, Mark asked me to provide a public review of his product and given my previous experience I was delighted to put this together. DiveIntoTheFold was not paid for this review, other than providing samples of the most recent incarnation of the product that I was unfamiliar with. The views, opinions and experiences with the stickers (including competitive solutions) are all my own.

Saturday, 11 July 2015

Unboxing the GoPro Hero action camera

Everything you need to know about a GoPro Hero camera

I had bought a second-hand camera with underwater housing from a friend for the bargain price of £80. There was a problem in that it wasn't shooting video - but I thought that I might be able to address that.

A few dives later and I was finding the camera quite cumbersome, probably not helped by the fact I was taking a butter tub lid with me to use for white balance correction. I was struggling with handling it plus getting back into diving after a few years lay off - I watched my Polish friend, Olaf, with his nice compact GoPro and immediately thought that a much better idea because he could put it away in a pocket between shots. On my last holiday to Malta I had borrowed a friends GoPro and it did a great job and after diving with Olaf, I was convinced that getting a GoPro would probably help me get going with underwater and action videography better than my current camera.

And for my birthday, my fantastic girlfriend bought me the entry level GoPro called the GoPro Hero.

Whats a GoPro?

A GoPro is known as a compact action camera. The traditional camcorder of old is pretty much dead now with the rise of smart phones capable of shooting respectable amateur photography and videography. So technology came about to meet the needs of the more sporty end of videography. Cue the GoPro. Action cameras are designed to be very small and lightweight as well as being fairly rugged. It wasn't until about 2014 that other manufacturers caught up with the surge in demand. The most notable being the Sony ActionCam using very respectable Zeiss lenses.

You don't have to worry about your DSLR and expensive lenses getting wet or damaged when you have a GoPro, designed to be exceptionally rugged through simplicity, it takes Point and Shoot to a whole new level.

Unboxing

The GoPro Hero comes in a lovely white card box with a nice cut-out so that you can see the camera in its waterproof housing and start to appreciate just how small it truly is! The front is quite plain with just a few photographs, the model name and a small note stating that its waterproof to 40m (131 feet).

GoPro Hero packaging - Front
The left hand side of the box has three sections of information about the features, video shooting options and photo shooting options. These are :
  • Features:
    • Superview - performs stretching of the image at the edges to fill a 16:9 screen
    • Auto Low Light
  • Video
    • 1080p at 30 and 25 fps
    • 720p at 60 and 50 fps
    • 720p Superview at 60 and 50 fps
  • Photo
    • Resolution: 5MP
    • Burst photo: 5MP @ 5fps
    • Time lapse: 0.5 second interval
Lefthand side of package

On the righthand side we see a list with drawings of what is included in the pack. Besides the camera there is a refreshing list of extras. The total list is:
  • Integrated camera and housing
  • Built-in battery
  • Skeleton backdoor
  • Quick Release buckle
  • Flat adhesive mount
  • Curved adhesive mount
  • USB cable
You are also advised about requiring a microSD card. 

Righthand side of package

Finally on the back there is a large schematic showing some of the key features, or rather selling points such as the depth rating on the housing, wide angle lens etc.

Back
After being teased about how awesome a GoPro is, it's time to get at it! The front cover turns out to be a sleeve which can just slide off after the sticky plastic badges on either side are cut.

Sleeve removed from package
Still no closer to get at it! The packaging is sealed once again on the back at the top with the plastic hangers to allow display on walls. Cutting through this allows you to get the front and back packaging apart. Both parts of the packaging are made from good cardboard.

Now we get a glimpse of what is included in the packaging. At the top we can see the GoPro Hero camera held under a plastic shield, at the bottom is some paperwork.

The first small pamphlet (top left in the image below) is about Getting Started with your GoPro. This is not a quick start user manual. The manual comes in six (6) languages (including English, French, German) There are four basic points that it recommends that you do:

  1. Sign up for a GoPro account - Submit your most epic photos and videos for the chance to become GoPro famous (optional)
  2. Get the GoPro app (optionl)
  3. Download GoPro software - easily import, view and edit your content. Create gorgeous, GoPro-style videos. (highly recommended)
  4. Update your camera - get the newest features and best performance from your GoPro by keeping it up to date with the latest software

The GoPro Studio software is an all encompassing editor and camera management toolset. It's a rather hefty 115 Mb download - you don't need an account to get the software and it also allows you to update your camera as well.

The next document is the Quick Start Guide (bottom left in the image below). The Quick Start Guide shows how to use the camera and provides some advice on using your camera.

The third document is the Important Product and Safety Information Guide (bottom right in the image below).

Finally three GoPro stickers are included. I like these kind of things, I've got a Stormcase for my HID light which I use as a sticking ground for stickers from suppliers!
The paperwork
With the paper out the way, we can now remove the plastic shield holding back the camera. Removing the cardboard interior packaging also reveals some of the accessories. These are:
  • USB lead
  • Skeleton backdoor
  • Curved adhesive mount
  • Flat adhesive mount
The skeleton door is used to allow you to have access to the USB port with a wire, allowing better audio recording and charging while recording when connected to a PC. This could be useful if shooting lots of static / slow moving subjects in an interview type setting, especially in a hot environment.

The two adhesive mounts will be discussed further below.

Camera and accessories
Below are the two adhesive mounts; on the left is the curved mount and on the right is the flat mount. Below that is a device which is used to prevent the GoPro Quick Release potentially coming free during a high vibration environment.

Adhesive mounts and security bracket

Now we get to the good bit, the bit we are really interested in - the GoPro Hero camera. The GoPro (including the case) has dimensions of just TBD mm x TBD mm x TBD mm (width by height by depth) and weighs just TBD g.

To put this into context, I've photographed the GoPro Hero next to my Samsung S3 smart phone and a £2 coin.


Relative size of the GoPro Hero

The GoPro Hero camera and the housing are fully integrated - you can't remove the camera from the housing. Nor can you remove the battery, charging the battery is done via the USB lead.

Opening the housing

To get at the camera you open the back door. GoPro have come up with a brilliantly simple, yet absolutely secure system using a pivoting latch on the top of the camera. 

The GoPro comes with some charge, but a full charge is the first thing you will need to do, so get it plugged into your PC and charging up. Also you need to get a microSD card inserted. You don't need to worry about formatting it first - the camera will do that for you.

Connecting to the PC

When connecting the GoPro Hero to your PC for the first time you will find that Windows just treats the camera as external storage and so just works straight off. A really cool "feature" for me is that the camera shows up in my devices with the image of the Hero as well. 

Geeky feature

Connecting to the GoPro by double-clicking it in the Device menu gives you a selection of options to either view your media, copy it across, or get the GoPro software suite (which will then do all of this for you).

Hero Control Panel
After installing the GoPro software suite and re-connecting the camera you will probably be given the option to update the firmware on the GoPro.
Firmware Update


Real world testing

So I've shown you all about the GoPro Hero, its packaging and contents as well as some features, but how good is it? 

Underwater

The first thing I had to do with my GoPro before I took it diving was to find some way of securing it during dives, so all I did was attach a boltsnap. This would allow me to clip it off while entering and exiting the water and any times where I didn't want to film.

Diving with the GoPro is great, without taking any measurements it probably slightly negatively buoyant which means it stays in your hands and not want to float off. Even with thick wet gloves (5-7mm) that I was wearing, operating the GoPro was easy, because the two buttons are large and positively respond when pressed (I also had the button press noise on as well). The only annoyance was that I wanted to switch between taking video and pictures which because of the linear cycle through the menus mean't that I would have to go through all the different modes before I got back to Video (or Photo), it just meant a lot of pressing

In practice, I found that there is definitely a delay in the image capture. When you press the shutter button (top) to take a photo graph. The red LED on the back will flash three times. I think its only once its finished flashing has the photo actually been recorded. In my mind, pressing the shutter button means the image is captured upon release, once I'd taken the picture (releasing the shutter button - its now started its saving process) I would move on. This led to a lot of blurry images, with only the occasional still image.

Blurry images are easily achieved

Reviewing the video as well, I learned that the GoPro Hero REALLY like having the light, it makes a considerable difference to the quality of the images I found, this is probably due to noise in the camera. The following images were taken at the same depth, one after the other.

Looking horizontal at a depth of approximately 11m

Looking up from a depth of approximately 11m

In the latter image, whilst the foreground isn't particularly well exposed (compared to the former) there is a much better feel in terms of depth in the image. By that I mean I feel like I can't see much past the diver in the second image whereas the first image I get the impression that I can see much closer to the surface.

Another aspect of the camera liking light - when not VERY shallow or under virtually direct and intense illumination the colours become very washed out very quickly (as a diver I completely understand this, but I'm still very very surprised at how quickly the wash-out is occurring - these photos are less than 6m under water)

Underwater selfie, colours look good - you can see the blue of my mask and fin reflection well, even the yellow of my backup regulator is clear) - depth approximately 3-4m max
Downward looking photograph - same location, perhaps 4-5m max

On land / the surface

One thing that strikes you with the GoPro when taking photographs is the massive lens distortion

Massive lens distortion
In some ways the lens distortion can be really creative and quite desirable. It's not really a problem, most image editing programs provide functionality to allow you to fix this.
Not so major lens distortion.

Conclusion

The GoPro Hero camera comes with no internal memory so buying a microSD card is absolutely mandatory. For shooting Full HD video at 30 fps, a full class 10 card is recommended. All of the video and photos I took to make this blog up was taken on a very cheap Class 4. Perhaps using a Class 10 would have improve the photo taking process and reduced the number of blurry photos?

For the size (matchbox) and price (under £100), I am more than impresed with my GoPro and want to thank my amazing Charlotte for a wonderful present!

Friday, 2 May 2014

DVD Review and Summary : DIR 2004

DIR 2004 DVD Review

About the DVD (from the manufacturer)

"The most comprehensive overview of the "Doing It Right" system ever available on video.

When Jarrod Jablonski and George Irvine set out to develop a replacement for the very-popular (but somewhat dated) DIR video series, their goal was to provide a complete head-to-toe presentation of how they configure their own dive gear to conform to the DIR standard. By the time they finished filming, the project had grown in scope to cover not only essential DIR concepts like team procedures and dive planning, but advanced topics like gas mixing and Gavin Scooter maintenance.

Encouraged by their results in covering the DIR basics, George and Jarrod then sat down to an extensive series of interviews that provide a fascinating history of the development of DIR diving within the Woodville Karst Plain Project and the logistics of exploring Wakulla's deep cave system at the extremes of dive technology and practices. To cap the project off, George and Jarrod narrate a complete dive within the Wakulla cave system. It's the first time that anyone outside the team has been able to listen in as the WKPP's lead explorers review the results of a project dive.

DIR 2004 is essential viewing for anyone interested in applying DIR concepts to their diving. It can be seen as a supplement to the successful DIR Fundamentals book or to a DIR Fundamentals class, but it also stands alone as a document of the evolution of safe diving practises at the cutting edge of underwater exploration."

Pricing and Purchase Locations

Packaging

First impressions are promising : the DVD collection is in a normal DVD case with a nice cover, on the front a nice diving scene, on the back is the DVD contents (detailed and summarised below). Inside the three DVDs are secured firmly to the casing.

Disc 1 Summary

The first disc is aimed purely at the equipment you carry as part of your rig and starts from a blank twinset right up to a fully equipped rig. There are the following chapters on this DVD:
  1. Introduction - 9 minutes
  2. Tanks - 11 minutes
  3. Wings - 10 minutes
  4. Backplate & Harness - 17 minutes
  5. Fitting a backplate - 21 minutes
  6. Lights - 31 minutes
  7. Regulators and hoses - 27 minutes
  8. Balanced rig - 10 minutes
Starting the DVD I get a quality impression, there is only one menu to allow you to select which chapter you wish to watch or watch all sequentially. I think the menu looks very nice, the imagery in the background is beautiful, the audio is nice and crisp and the menu is exceptionally easy to read and navigate.
DVD #1 - Main Menu (from DIR 2004 DVD)
Pressing "play all" starts the DVD and will run through all of the menus visible without requiring intervention.

Introduction - Summary

In the introductory section Jarrod Jablonski (JJ) and George Irvine the Third (GI3) talk very briefly about the origins of underwater exploration and the emergence of recreational SCUBA diving. GI3 then touches on that whilst diving as any sport has risks, he felt that unnecessary risks were being put into the sport.

Introduction - (from DIR 2004 DVD)
JJ explains a key point of DIR. There will always be a special configuration that is better for a particular situation. But JJ explains that the key feature of DIR divers is the skill of the divers are better because of the standardisation and optimised gear, responses and team work. JJ also explains that the background of DIR was founded from technical diving, however their experience is that the skills are the same for the recreational diving area.

Unfortunately at this point JJ and GI3 highlights that they will talk about the more typical recreational, single tank rig. But at no point in the DVD collection does this happen. GI3 does highlight how the gear used by the technical diver and the gear used by the recreational diver are actually the same.

Tanks - Summary

Moving onto the equipment configuration of a DIR rig, JJ introduces and will use a manifold twinset (doubles) of Aluminium 80 cuft cylinders. While talking about the materials available for pressurised SCUBA tanks, JJ highlights the concept of a balanced rig. GI3 explains the basic principle of the operation, what a manifold is, and the reason why a manifold is used, as well as the basic process of manifolding two tanks. Although I must admit, his way of building a manifold twinset sounds far more complicated and awkward than I've used!

GI3 continues to explain another feature of the manifold : it shouldn't be a solid structure it should have some flex in case of hitting objects during cave or wreck penetrations as an example. GI3s explanation of the manifold is a bit jumpy in that he went from talking about the burst discs to then why we have an isolator manifold. JJ then does step in to explain about the operation and gas glow when using a manifold.

GI3 then returns to the conversation to resume talking about the twinset building process. An important point he does raise is that the top band needs to be at the break of the neck of the tanks, i.e. the highest point. Continuing his explanation of the twinset, he explains that soft rubber knobs are ideal, again to prevent damage to your life support system.
Manifolds (from DIR 2004 DVD)

Buoyancy Compensator - Summary

In this section, JJ and GI3 together fit a Buoyancy Compensator (BC) to the twinset. At this point I think they let themselves down as they are both required to do it - a bit of planning and scripting would have meant that one could have talked while the other attached the BC. JJ and GI3 are using a Halcyon Explorer 40 wing. A horse-shoe shaped wing.

GI3 explains that historically the WKPP had a lot of trouble finding equipment that suited their needs, shape, material, inflator location were never right. JJ explains that the wing being demonstrated is made from a Ballistic Nylon exterior for protection of the bladder which is made of cordura inside.

Buoyancy Compensator (from DIR 2004 DVD)
JJ explains about how the inner bladders used to be very vulnerable and required protection, but now doesn't need the same level of protection. GI3 then explains that the lift capacity required by your wing needs to be enough so that the fully assembled rig can be floated in fresh water by itself so that if you need to get out of your rig, e.g. if you are RHIB diving you would take your set off first, it will float.

GI3 explains the wing vs jacket-style BC. The traditional jacket style BC causes the upper body to be compressed and adds bulk, the ideal system is smooth and hydrodynamic. The design of the wing also means it will put forward the least profile in the water keeping drag to a minimum. JJ explains how the wing style also helps the diver to achieve a horizontal profile in the water, whereas the jacket style BC causes the diver to be more heads-up/feet down in the water which causes drag but also risks coral and silt disturbance

Backplate and Harness- Summary

Demonstrating with a simple aluminium backplate and harness, GI3 shows how clean and simple the system is for the diver. With the jacket style BC, the inflation bladder is on the front of the diver, with the wing system this has been moved to the back and what remains is a very clean, clutter free harness for the diver.

GI3 continues to explain that the backplate bolts securely to the twinset. He also continues to demonstrate how clean the rig is, he talks about how bulky a "tech BC" would be - it would be good to see it in comparison.

JJ explains how quick release buckles are generally not necessary because it sacrifices stability and security against a misconceived perception that there is a difficulty getting into a harness on the surface. He also demonstrates that the wing inflator is stowed using a bungee which keeps it stowed neatly.

JJ also recommends that divers use the kidney dump as opposed to the corrugated hose because this keeps the diver in the horizontal position. Finally JJ points out the minimalist approach with the rig, particularly pointing out that there are only a few D-rings on the rig.

GI3 states how the crotch strap is extremely important because initially it keeps the rig down on your back, but also in a DPV dive, the crotch strap is used as the towing point which makes it a structural part of the rig. GI3 also explains that without the crotch strap your waistband will ride up your body. I can personally attest to this, on my first holiday to Malta, my crotch strap came apart and I dove the rest of the holiday without it - it did make some things more difficult.

JJ concludes by summarising some key points of the rig, webbing should be semi-stiff so that it resists wear. A knife is also worn on waist band too. Rubber o-rings, or snoopy-loops are also stored on the harness under the chest d-rings for the storage of back up lights.

Fittting a Harness and Backplate - Summary

JJ explains how the strength of the harness and backplate system is the almost infinite adjustable and the clean rig for the diver. The first thing the diver should look for is the waist passing through the crotch strap loop. The option is there if you want to use the main buckle to retain your canister light. But generally a second buckle to retain the light is the preferred. That way if you de-kit in water, you won't lose your light - something GI3 and JJ forgot to highlight. The buckle will be on the left waist strap to conform with the left hand release.

GI3 explains that another benefit is that you could use the same harness in combination with a single tank adaptor so that you can dive a single tank system instead.

JJ starts explaining about d-ring location and how its a balance for high for stage bottles, but low enough to be in line with the armpit approximately. Regarding the fit, there should be enough room to get out comfortably, but snug enough to prevent equipment rolling about on your back.

GI3 explains how the crotch strap is used as a tow point for towing a diver, but also you can have some space for helping you if you are struggling to reach your valves to push up the cylinder. At this point JJ explains how he would use a second buckle for retaining the light, but by having the primary buckle go right around it means that you can still retain your light if you forgot that buckle.

The harness should be set up in the thickest undergarments you will be wearing. Ideally fitting this in your drysuit.

JJ moves on to explaining about the crotch strap, the front d-ring (the ring at the bottom as it hangs down) is used for towing and shouldn't be used for carrying gear as it will hang straight down. The rear d-ring can be used for clipping reels to. The location of the d-ring is described.

Setting up the crotch strap (from DIR 2004 DVD)
The location of the left hip d-ring is explained. Again it would be nice if they covered each feature in turn. So the fitting of the harness first, then d-ring location, the crotch strap, its a little jumpy. GI3 explains how some adjustment is counter-intuitive i.e. raising the plate involves lengthening the crotch strap.

JJ challenges the view that quick release buckles are not necessary and that the difficulty of getting out compared to the jacket style BC is a misconception. GI3 does re-iterate his view that quick release are a potential hazard.

GI3 and JJ start to explain the process of webbing a harness : starting from the back and then making the straps.

Lights - Summary

JJ explains that divers very often think of lights as an illumination tool, the DIR system uses the light as a communication means which helps keep a team together. JJ shows a primary (canister) light and a backup light. Batteries for a canister light would be rechargeable whereas disposable batteries are the preferred choice for back up lights.

GI3 explains about the history of off gassing batteries and the rationale behind the surface sealing o-ring. GI3 explains that a key feature of of the light is that there is a switch guard to protect the switch from accidental switching. JJ shows a few of the key signals that can be made using the light.

GI3 continues to explain that the light has been an invaluable communication tool, ironically in clear water. He then goes on to show the mounting position of the light and how it adds zero drag because of the position under the arm. The clip for the light head is shown and usage explained. GI3 also reminisces about his first cave dive.

JJ explains how the Goodman's handle is used to allow the diver to continue to use his hand. JJ then explains why he thinks the head mounting of lights is a bad idea.
Back up and primary lights (from DIR 2004 DVD).
GI3 explains how he doesn't condone the head storage over the head because you then cause a problem if you need to donate.

Regulators and Hoses - Summary

In this section, GI3 explains the configuration of the hoses and regulators between the two first stages. He starts by explaining that the starting point is the back-up regulator. He recommends a slight mentality change - the regulator is a backup (to compliment the primary) as opposed to an octopus. The backup regulator is hung around the neck on a piece of bungee. This means that you always know where it will be and not need to search for it.

While GI3 is sorting out the hose routing so that the back up regulator goes under the corrugated hose, JJ explains that he is demonstrating the routing based on a non-swivel regulator and hints that he will explain other types - but never does.

Going back to the regulator, GI3 explains that you want a simple 2nd stage because you will want to be able to disassemble the regulator underwater. The backup regulator is de-tuned to keep the performance low to prevent free flows. A back up that can be de-tuned is desirable. The wing goes behind the hoses.
Hose routing of the left post (from DIR 2004 DVD)
JJ and GI3 explain that all hoses should go down to keep them streamlined. The backup regulator hose is approximately 24" long. The SPG hose is a similar length. GI3 explains about the potential roll-off of the left post and how the splitting of hoses has been done to share resources between the posts.

Moving to the right post, GI3 explains that the hoses go behind the wing. The wing inflator hose is on the right post too and goes through the bungee loops on the wing inflater hose.  He then demonstrates the correct routing of the long hose and explains why the right post is the only choice for the long hose. He then also demonstrates the long hose deployment technique.

JJ explains the options for drysuit inflation depending upon your dive, GI3 explains the mounting and mounting choices.

Balanced Rig - Summary

GI3 explains that the balanced rig is a fundamental part of the DIR system. He tries to explain that the mentality of using a BC as back up buoyancy isn't how it is intended, it is intended for fine tuning. He explains that the process of working out your weighting requirements is to get in the water with just a small amount of gas so that you can breathe, but effectively empty tanks and empty wing and minimal gas in the drysuit. This gives you one extreme of your weighting - the worst case scenario that you are low/lost your gas - you want to be able to stay at 6m to do any deco/safety stops.

The other end of the extreme is that at the start of the dive when you have a full twinset you can still get up - this may involve dropping lead however - hence why you need a distribution of weight and not all in the form of v-weights for instance. The explains that the difference in weight from the former situation will be purely the weight of the gas.

You will need enough removable weight so that you reduce your negative buoyancy to no more than what you could potentially swim up against. A diver needs to remember that they can use their equipment such as lights as part of their weighting system.

Balanced Rig (from DIR 2004 DVD)
JJ and GI3 both explain the merits of the balanced rig : streamlined and minimalist approach in the water as well as easier diving, by having the minimal gas volume in the wing, it means less gas is expanding during the ascent.

Disc 2 Summary

The first disc is aimed at the fundamental / core equipment that you need as a diver. Disc 2 on the other hand covers the secondary / additional equipment you may need such as stage / deco bottles, scooters, drysuits etc.

There are the following chapters on this DVD:
  1. Exposure equipment - 10 minutes
  2. Additional equipment - 9 minutes
  3. Stage bottles - 26 minutes
  4. Gas mixing - 16 minutes
  5. Procedures - 55 minutes
  6. Gavin Scooter - 38 minutes

Exposure Equipment

GI3 explains about exposure suits (wetsuits and drysuits) whilst in his garage. He explains how wetsuits are ideal for warm, shallow diving, but the problem with thick wetsuits is the compression of the suit. I personally have seen this. Whilst in Malta in February I was diving in a 7mm wetsuit. I remember tying on my depth gauge to my wrist as tightly as I could whilst kitting up in the van. Upon jumping in the water and descending just a few meters the suit had compressed massively and was at risk of having the gauge slide off my arm.
Exposure suits (from DIR 2004 DVD)
With neoprene drysuits suffering the same buoyancy swing as thick wetsuits he does not recommend them. Moving on to the trilaminate drysuit he shows his DUI suit off. The benefit of the trilaminate suit is constant buoyancy, all the lift is coming from the insulation and assuming the diver maintains the suit pressure.

GI3 explains that the key features of a drysuit are self-donning ie. front entry and the zip must have a zip guard. The inflater should be a swivel. The exhaust valve should be on the arm. Pockets should be on the side of the legs and not on the front so as not to cause extract drag.

Finally GI3 explains that he has a custom fit suit as this helps the suit fit well and avoid excessive bagginess. He shows how his feet and legs are also as snug as possible. A telescopic torso helps with flexibility.

Additional Equipment

GI3 explains that a computer isn't used - a depth gauge and bottom timer is used and placed on the right wrist this is because if you move into DPV diving, the display will always be there and easily visible and illuminateable by your light in your left hand, a compass is on the left wrist.


Computers are not condoned because they believe that the computers never generate accurate decompression.

The Scuba Pro Jet Fin is the typical and recommended fin because it gives you good thrust. When you move into multi-equipment diving you need a stiff fin to put the power into the water. Heavy fins are also helpful to keep drysuit feet down. JJ explains how split fins are very difficult to use and make some techniques very difficult, almost impossible. GI3 explains how spring straps are used to prevent breakage.

Masks need to be very comfortable and of low-volume to make it easy to clear. Slap straps, stretchy straps also keep it close to your head to prevent catching on debris in the water.

The head dissipates massive amounts of heat so a good quality hood helps a diver to keep warm and stay comfortable.

Stage Bottles

GI3 starts by explaining that only MOD is written on the bottle. Luxfer aluminium 80 cuft cylinders are recommended because of the buoyancy swing from full to empty. The goal is to have a neutral cylinder as this makes diving with them easier.

DIN valves are used on stages and this minimises risk of losing o-rings. In the same way as the twinset valves, the stage valves need to be rubber and of good quality - an easy turning valve, this allows you to feather a valve in a case of emergency.

Stage bottles (from DIR 2004 DVD)

JJ also confirms that minimal stickers are to be on the bottle, the only information you need to know on a bottle is that its safe to breathe at depth. Nitrox labelling is useless. He continues to explain about the rigging kit and how it affects bottle positioning in the water.

GI3 explains how rubber bands are used for stowing the regulator hose against the tank. JJ then explains about regulators and the hose routing. A short piece of cave line in a loop is used to keep the SPG on the short hose stowed neatly. A bolt snap on the stage reg is used as it means that you can clip the stage to the bottle for quick stowing if needed.

JJ and GI3 do explain about procedures for stowing the regulator and the hose and some issues that can arise.

Gas mixing

Returning to GI3s garage to explain the very loose procedure for gas blending. GI3 explains how gas blending is critical part to gas diving because breathing the wrong gas could be fatal. GI3 starts by showing how two pieces of tape are used to summarise the blend records.

GI3 is blending a gas and is adding 80 psi of oxygen. Once happy that the correct amount of oxygen has been added. The tank is turned off, but the whip is still left attached. On the first piece of tape, the amount of oxygen that has been added and the date is recorded.

He explains a good practise when using a cascade blending system is to keep a running tally of the pressure inside a tank. The helium is now added to the mix. The helium added is then also added to the first piece of tape.

Gas blending (from DIR 2004 DVD)
GI3 explains about some of the challenges facing blenders i.e. reduced density of helium vs oxygen, heating of gases during filling, implications of using partial pressure blending on the mixing of the gas. Once the air has been blown on, the analysis of the tank contents is done and recorded on the second piece of tape.

He finishes by explaining how the bottle and the mix is handled after the dive.

Procedures

GI3 and JJ are on the sofa talking about emergency procedures. The discussion starts by talking about the team approach to diving. GI3 is quick to encourage that any macho "I can take care of myself attitude" needs to be dismissed. When a team member has a problem, that person should become the focus of the team.

Procedure discussion (from DIR 2004 DVD)
GI3 and JJ are keen to continue to emphasise that problems in the team are problems of the entire team. JJ then explains that even a good team needs to manage problems effectively to prevent problems accumulating.

GI3 and JJ are firm believers of aggressive problem solving. The discussion tends to based in the cave environment, but GI3 explains issues appearing in cave and open water diving.

JJ explains how the team would be behaving and responding if diving in a team of three and one diver lost their gas. GI3 gives a situation of a cave or wreck dive where you lose your primary light. They then use an example of team work about losing the line in a cave. JJ also discusses the situation of a gas failure and light failure and how the team would behave. GI3 also continues to explain how stages are used.

The two continue to talk about different scenarios and experiences that they have had.

Gavin Scooter

Returning to GI3 and his garage to talk about the scooters used. Starting by discussing the battery packs and particularly talking about the long-range scooter dive scooters. GI3 emphasises the importance of knowing the battery condition by using a burn tester. The burn tester is an array of resistors that mimic the load of the motor that the battery would see and then record the time taken for the battery to drop from 24v to 20v.

Post dive maintenance involves opening the lid to inspect the motor. There are three primary components to the scooter, so its very easy to fault find any problems. GI3 recommends measuring the current draw of the motor occasionally.

The Gavin Scooter (from DIR 2004 DVD)
GI3 goes into detail to explain the features of the motor and why the design is what it is.

The Gavin Scooter section actually has several sub-sections in it. The next section discusses the motor in detail and the sub-assemblies. GI3 explains the difference between the motor in the Gavin and Aquazepp. The next section covers the clutch assembly. GI3 is showing the clutch assembly, unfortunately he is spending a lot of time looking down working with components in his hands. He then shows you assembling the clutch and propellers and assembles the back end of the scooter. He talks about how you should manage the pitch of the propeller to manage speed.

The next section discusses a vacuum test to find leaks.

The next section discusses about finding a reed switch failure and he explains that you can quickly trace the fault as the sub assemblies are extremely simple. He shows this by quickly changing out the motor.

The next section is about the trigger wheel. The trigger wheel is there because if the trigger cable breaks you can hold the wheel to drive the scooter. GI3 then goes on to strip down the prop assembly.

Disc 3 Summary

The final disc covers the history and founding of GUE and some of the exploration sites and techniques used.

There are the following chapters on this DVD:
  1. Getting started - 27 minutes
  2. Diving & DIR - 54 minutes
  3. Planning extreme dives - 50 minutes
  4. Decompression - 52 minutes

How did you get started into diving?

GI3 and JJ start having an extremely informal chat about their first introduction and experiences into SCUBA diving.

GI3 and JJ talk about their introduction to SCUBA diving (from DIR 2004 DVD).
After talking about how they discovered SCUBA diving, they move on to talk about how they got into cave diving and describe their first cave dive and give some advice about building up cave diving experience. They then reminisce about their first dive in WKPP and Wakulla.

GI3 talks about the start of the WKPP and how when the team were asked to support a wreck diving course, they reviewed the equipment set up to make it universal.

Diving and DIR

Initially GI3 and JJ are asked if DIR is all about an equipment configuration. GI3 goes into the detail of describing it. JJ talks about how DIR is a difficult diving technique and receives a lot of grief, mostly directed at the equipment. GI3 supports this and says how his experience has always been pro-DIR dive systems. GI3 and JJ are both supporters of the idea that people need to prepare themselves for diving i.e. keeping fit.
DIR Diving (from DIR 2004 DVD).
GI3 explains that in particular the DIR equipment system works for any situation, but there will be environmental specific equipment. He goes on to explain that its more than just the equipment. The discussion then moves on to standardisation and the power that it offers. At this point, you can tell that JJ does express some frustration that he has been challenged about the DIR equipment configuration, he expresses that once someone has done 300, 500, 1000 dives, then they are qualified to challenge and try to improve their rig.

When asked about GUE and DIR GI3 and JJ both support both ventures. And the biggest challenge that faces the diving industry is the mis-information that is available. GI3 goes on to explain why he gets so angry with people on the Internet. He actually believes that there are people intentionally misdirecting people. JJ even defends that GI3 has been an overall positive influence.

JJ and GI3 continue to talk about the issues they have found with the dive industry, dive industry attitudes etc.

Moving on the discussion changes to what it takes to get into big cave diving and how it appeals to them.

Planning a big dive

GI3 explains how historically they used to log how much equipment, time and gas they had at any one point. But they now take the view of what do they need when at the end of the line. JJ explains that they use a team approach to support the diving.

GI3 and JJ laugh about how when they reach the end of the line and they chuckle to themselves. Hitting the end of the line, JJ is usually the one to lay the line whilst GI3 performs the survey and at the same time they are using the Minimi scooter-camera combination.

When asked about how far they think they can go, JJ believes there isn't really a limit. GI3 says that he thinks that the equipment is no longer a factor.

When discussing the scooters, GI3 discusses all the key elements and explains how he believes its all balanced out perfectly. Talking about carrying all the gear, they explain about how they achieve it.

When talking about dangers and risk, GI3 explains that the decompression is the most dangerous part of the dive. JJ explains about his view of using elevated levels of oxygen in terms of both the bottom gas and the deco in some parts.

GI3 talks about his opinion of decompression. He explains how the current decompression models are flawed. He explains about how they re-shaped the deco shape to get better decompression. JJ even mentions that you can force bubbling in your body to accelerate decompression - although he doesn't condone it. They do some quick comparisons between the deco that traditional algorithms propose versus what they actually do.

Is Decompression an exact science?

JJ explains that there is a desire that decompression can be modelled for all divers but he believes it won't happen. He introduces some of the things that they did such as removing the usage of air. GI3 gives an example of diving at Indian springs and looking back they see how their performance was reduced because of the narcosis.

GI3 explains how he thinks there isn't an awareness of PFOs. And how they had to change the mentality of the attitude to deco i.e. re-shaping the deco curve based on the experiences they were seeing.

When asked about using helium in shallower depths, GI3 explained how JJ was running the alternative mix while GI3 was running the traditional mixes.

When asked about 100+ foot air dives GI3 believes that it comes down to educating divers about the real physiologic impacts. JJ supports this by explaining about how a person would be compromised and also dismisses the view that people can learn to manage narcosis.

When asked about if GI3 is being irresponsible pushing their decompression beliefs. GI3 believes he is trying to challenge the mis-information, and he believes that the decompression theory they use will "hold water" and can't be defeated easily. The other half of his explanation comes down to the fitness of the diver as well. GI3 also believes that the decompression algorithms out there at the moment actually have very little solid evidence.

Woodville Karst Plain Project

A short 17 minute video, narrated by JJ and GI3 discussing the WKPP. During the commentary maps show the area and the cave survey. Eventually the video shows the cave passages and highlight how that could connect to the Leon Sinks cave system. JJ and GI3 explain how the core goal is to help protect the environment from the urban sprawl.

Some of the equipment such as the scooters, rebreathers and vast number of stages required is shown. They talk about the decompression and how they stage food and drink.

Overall Summary

The DVD is presented in a very relaxed format, some of the discussions are done on a sofa and are very casual with some light hearted jokes in there too. Unfortunately video production does let it down. Whilst there is no need for overly elaborate video production, the poor audio is apparent at times with several "standing-in-front-of-the-mic" situations, and especially when things go outside into a garage.

This DVD has taken a significant amount of grief, (http://www.scubaboard.com/forums/archive/index.php/t-107088.html) and I think most of it is undeserved, but I can see how some of it has been earned. As a DIR diver of about 5 years, I can now really listen in to what GI3 (in particular is saying) and I can filter out the "strokes" statements, but it is because I have this experience and knowledge which means I can hear the truth in it. Giving this DVD to someone who is a diver with 50 dives to their name, won't be able to pick out the true gems of knowledge, this is what lets the DVD down I think, so if a new DVD was produced it would have to be ultra-carefully scripted to make the key points more obvious and not hidden by personalities.

The DVD is actually aimed at DIR-aware and pro-DIR divers, whereas I think they actually wanted it to be a DVD that any diver could watch. Unfortunately it took a lot of interrupts by JJ to do some background explaining (particularly with respect to the equipment). If a new version was made, I think they should have a typical diver configuration can show the trade-offs and presented in such a way that means you don't need to be experienced to truly understand it.

Personally, I think the DVD collection is brilliant and is an easy introduction into DIR and I would recommend it, what I would say is that it does pique your interest, and gives you enough information about DIR to make you want to know more (and sign up for a course).